
PAINTING FREE HAND ART By ( Kraegus ) |


THE BASICS |
This article is based on a thread on the Bolter and Chainsword Forum. It has been reproduced with the kind permission of Kraegus. |


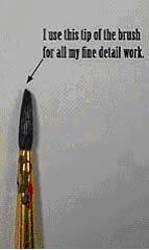
I have had a number of people express their desires for me to do a tutorial on freehand painting. Freehand painting is a very broad topic, and what you paint on a model really depends on the feel of your army as well as your personality. Like other techniques, mistakes can and will be made, and can be fixed. Don't ever get discouraged, everything is practise. A word to all of you who think I have spent many years honing the art, I haven't, I've spent 6 months of hard work. Whenever I'm painting freehand, I always use a reference, whether that be a white Dwarf, my Big Black Book, Space Marine Codex, Dark Angels codex, the internet, etc. Look at the mini receiving treatment and ask yourself where the most appropriate spot for a bit of iconography is. Think about shoulderpads and greaves. If this seems too small for you, try a larger model like a dreadnought, as the large open spaces allow for errors. I first spotted the design for my dreadnought arm in the Space marine codex (pg 32). I toyed around with the design, but generally kept it similar. Remember, a good motif may pop up in the most unlikely places, eg. one of my minis incorporates the border design from one page of a vampire counts IA article. Preparation: - Materials -What you'll need: -very fine paintbrush (should have only about ten or 15 hairs at the tip) -water -palette -design blueprint -well-lit workplace -Chaos Black -Skull White -a nice selection of primary colours Checklist of things to do BEFORE you dab paint on the model: 1.Water down your paint. I cannot stress this enough. Unthinned paint leads to very chunky and 3d freehand, which is not the look we are going for. The way I thin my paint is simple. Thin it just enough so it itsn't translucent, but enough to make sure it is very thin on application. 2.Have you sketched out a design? 3.Put both wrists on the desk and hold your miniature by the base or feet 4.Make sure you have at least two lamps or BRIGHT light sources to help you see if your colour transitions are good. 5.Is your brush good |
">

">
">
">
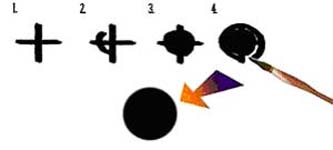
Painting Circles, and round-thingies: A perfect circle is nearly impossible to freehand from scratch, so of course it is much easier to cheat a little and get an identical effect, without spending two weeks to paint it. Place a very small dot in the middle of the space that will hold the circle, then paint two lines outwards and fill in the lines as follows. The circle is quite possibly the most important shape to master because it can be found everywhere. Gems, eagleheads, etc. This general step-bystep can be altered to fit anything ranging from ovals to diamonds, just change the length of your crosshairs, or flatten the curves between them. |
">
">
">
">
">
">
">
">
Painting borders, filigree, and brocades: I like this effect on metallics, although it can be used effectively on any other surface. For chromatic colours (red, green, etc.) as a standard rule of thumb, I always use a dark colour, like brown, or dark green, then take a lighter shade of that colour for the swirls (eg. Dark angels green, and then Snot green for the swirl) For Metallic colours I pick a metal, then take a shade of that metal for the brocade. Here's a chart BASE COLOUR | Highlight -------------------+------------ Boltgun metal | Shadow grey Mithril Silver | Skull White Shining gold | Scorched Brown Tin Bitz | Snakebite leather |
">
">
">
">
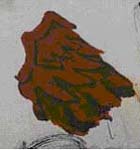
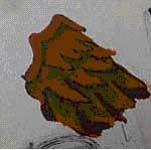
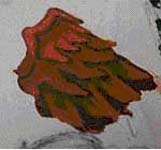
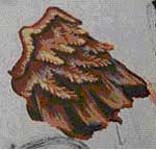
Painting Complex shapes: Every design has a starting point. No matter what the design, I always like to start with Scorched brown as my base coat when I rough out the general shape of my design on the mini. Using progressively lighter colours, start to shape the details of your design. At the end, sing a final highlight colour, and a very thin tip, slowly highlight the edges and final portions of the design. These three steps take me anywhere from an hour up to 5 or six hours depending on the size and intricateness of the motif. |
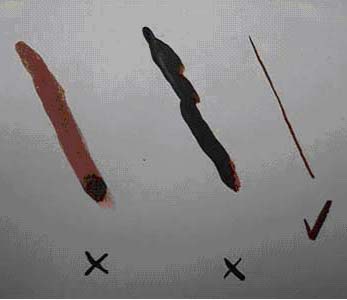
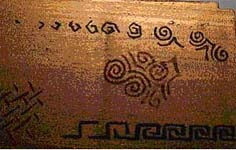
1.Pick out a base colour and a brocade colour (in this case I used shining gold and scorched brown) 2.using a very thin brush, and lightly watered down paint , draw a very small line on the surface, then draw another that is slighlty bigger, and so on, until you can get a swirly effect. The first time you ever do this, it will probably seem kinda messy and ugly, but if you are stubborn like me you'll practise it until you can do it flawlessly |
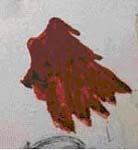
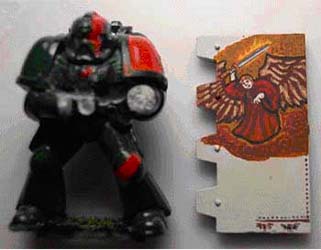
Practice makes perfect: My very first bit of freehand..(look at the knee)..Isn't it wonderful? (and some later pieces) |