PAINTING A DARK ANGEL SPACEMARNE By Anthony Barnes ( Amalric ) |


PAINTING THE UNFORGIVEN |


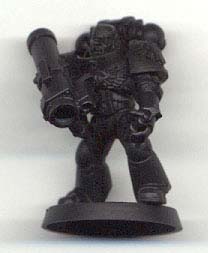
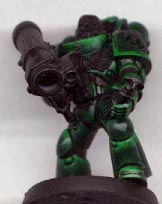
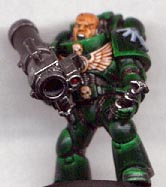
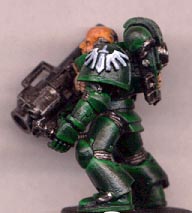
Step 1 - Undercoat: Glue the figure together, and undercoat with black spray. Give a little thought to how the marine is posed. The traditional pose with the bolter across the chest can make the chest eagle very hard to paint. If that is how you want the marine posed it may be better to glue the body, head and backpack together first. And paint the arms and weapons separately, gluing them on afterwards. I am using the DA shoulder pad from mail order. They set the figure off really nicely and are definitely worth the extra money and effort in my opinion. |
">

">
">
">
">
">
">
">
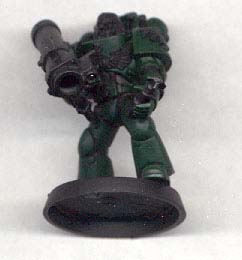
Step 2 - Armour Basecoat: The armour is base coated with Dark angels green. I find that two coats are needed to get a decent coverage. I use the black lining technique, i.e. the cracks and recesses in the armour are left black to provide shading. |
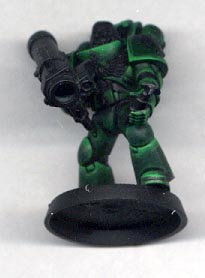
Step 3 -Highlight Armour: Two highlights are used. The first is a very obvious Snot Green. It is watered down and blended in from the edge of all armour plates. The second highlight I use is a mix of an old colour called Emerald Green (Snot Green will work just as well) and Skull White. Again watered down and blended in from the edge of armour plates. I restrict this highlight to the top of the shin armour plates (greaves?), top of the knee plate, top of the thigh plates, top of the chest armour, front corner of the shoulder pad rim and the top of the backpack. This is a sparing highlight on the very edge of those armour pieces. If the Marine is wearing a helmet I also highlight the rim above his eyes and the bit above the grill. The only piece of armour I dry-brush is the centre of the right shoulder pad, it makes it slightly lighter and I am not too worried about it looking less neat as I will cover it up with transfers later. At this stage the highlights make the armour look almost pastel. It doesn't look right but don't worry as the next stage will sort it out. |
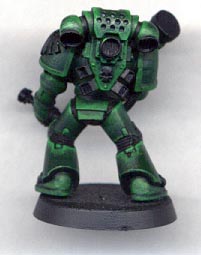
Step 4 - Glaze Armour: Easiest step of them all. Two coats of Green Ink are painted over the armour. This smoothes the highlighting and also brings up the edges. |
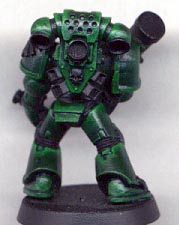
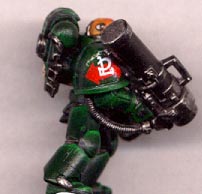
Step 5 - The Details: Almost there now. Just the finishing touches: Chest Eagle and Skulls: Base coat of 50:50 mix, Vomit Brown and Bleached Bone. (I have two pots of this ready mixed up.) Washed with watered down chestnut ink. Highlight with Bleached Bone and then lightly with Skull White Flesh: Base coat Bronzed Flesh. Washed with watered down Chestnut Ink. Highlight with Bronzed flesh and then lightly with Elf Flesh. Chapter Symbol: Base Coat Shadow Grey. Highlighted with Skull White Transfers: Tactical designation transfer applied. Then painted with Blood Red. One coat of Gloss Varnish applied. Then squad number transfer applied. Finished with another coat of Gloss Varnish. |
If the marine was wearing a helmet the eyes would be painted Blood Red. All these highlights were done by watering down the highlighting colour to roughly the consistency of milk, and then building them up in layers on the raised areas of the surface. There you go, all done and ready to base. This is not the quickest or only way to paint a Dark Angel. It takes me about 3 hours plus to paint one marine. But it looks nice and that's what bothers me. |
">
">
">
">
This article has been repoduced with the express permission of Anthony Barnes. |
">
">
">
">
">
">
">
">
">
">
">
">