
ANGELS OF REDEMPTION PAINTING GUIDE By Douglas Miller (ODM) |


PAINTING THE UNFORGIVEN |


This article has been published here with the express permission from Douglas Miller. |
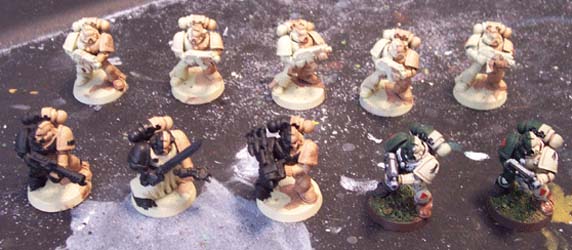
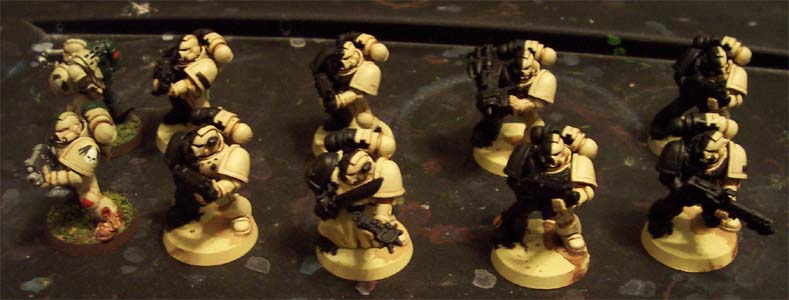
Introduction This is the starting point for my entry into "The Great Race" group painting challenge. Three stages of painting are pictured here. Two completed marines can be seen in the front row to the right. Three are in the Black Undercoat stage, also in the front row, and five are in the Primer and Wash stage in the back row. I will bring the five in the Primer and Wash stage up to the Black Undercost stage, then move all seven forward together in steps towards completion. |
Step 1 - Primer and Wash. I commit heresy by priming any Bone/White armored minaitures with Bleached Bone. I use the GW spray, then touch up any areas with incomplete coverage out of the paint pot. Then I do a medum wash of brown paint on all the areas that will end up with bone or white colored armor. In the case of the Angels of Repentance, that means only the right half (from my perspective) get the wash. |
">

">
">
">
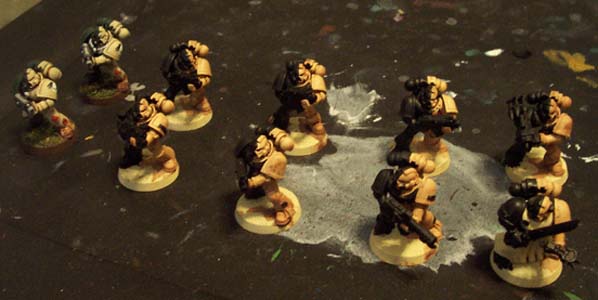
Step 2 In this step I paint the non-washed side the of the marines chaos black, as well as all the details on the "bone" side that will be painted other colors. These include eyes, rivets, skulls, the wax part of purity seals, pipes, and the technical partes and main vents on the backpack. I start with a fine brush to create a vertical line cutting the model in half, and to pick out the details. Then I use a larger brush to fill it all in. |
">
">
">
">
Step 3 I paint the bleached bone armor sections. Basically, I paint an even coat of bleached bone over the wash. I paint the armor sections only, leaving the cracks and joins showing through. I use watered down brown for any mistakes, making sure all the armor details remain visible. |
">
">
">
">

">
">
">
">