ON YOUR KNEES MARINE! By Adam CAtt( Straycatt ) |


MODELLING THE UNFORGIVEN |


This article has been published here with the express permission of Adam Catt. |
How to create a kneeling Space Marine: |
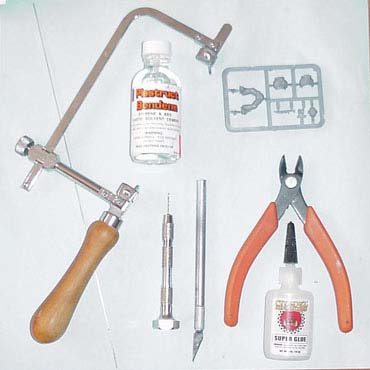
Step 1 - Initial preparations: Firstly, the basic tools that will be required are pictured here: 1. A jewelers saw 2. Hobby knife 3. Pin Vice Drill 4. Brass Rod 5. Liquid Plastic cement 6. Super Glue 7. Marine model 8. Green Stuff (Not pictured) |
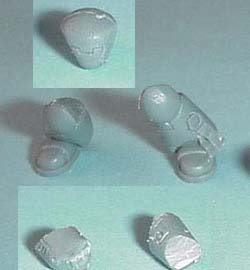
Step 2 - The techniques I have listed here will allow you to pose marine legs in almost any position you might want, coming down/going up stairs, etc...... Remove the legs from the sprue and clean up any mold lines, using the modelling knife and if necessary a file or sander. In addition, remove any extra details around the kneepads. |
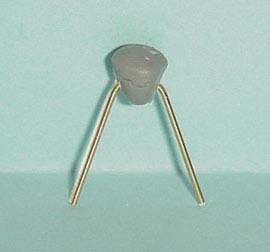
Step 4 - Drill a hole through the 'crotch' section for the support rod. It should pass completely through the 'crotch', and be positioned at the approximate location of the hip joint. Insert a length of brass rod through the hole and bend it to shape. It should look something like this.... |
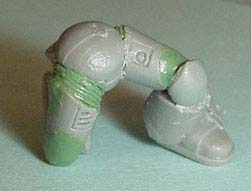
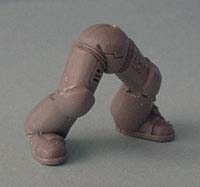
Step 5 - Drill through the various sections of the thigh and leg pieces and insert them through the wire. Then bend the brass rod until you get the rough shape of the marines position. At this point glue the various components in place. |
">

">
">
">
">
">
">
">
">
">
">
">
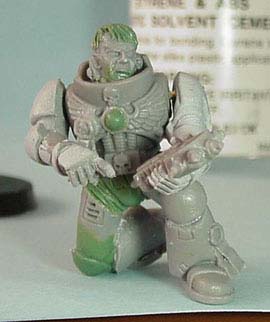
Step 6 - Greenstuff At this point it is necessary to fill in any gaps. Using small amounts of GS, fill in any gaps between the joints, trying to keep the transition between plastic and GS smooth. As far as the corrugation goes, the way I do it is to fill the gap, and then carefully use the sharp edge of my hobby knife to cut the channels for the corrugation. |
Step 7 - Final cleanup Once that is complete it is time for the final cleanup and addition of the right kneepad. Keep in mind, odds are no matter how careful you are, you wil need to do some gap filling..... |
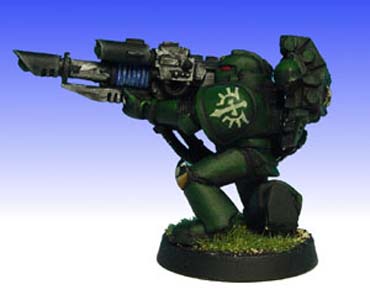
Step 8 - The finished product The Next step is to decide what you want to do with these legs. I decided to do a new character veteran sergeant but this is also the 'perfect' pose for any heavy weapons troopers. Let your imagination go wild. |
">
">
">
">
">
">
">
">
">
">
">
">
">
">
">
">
">
">
">
">
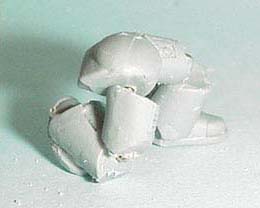
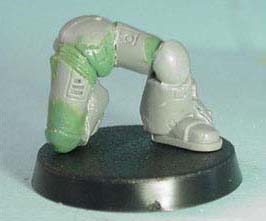
Step 3 - Using the jewelers saw, carefully separate the legs into 5 pieces. Cut it at the knee joints (preserving the kneepads), and the hip joints. Remove all of the corrugated areas that survive the cutting process. (These will be replaced later with greenstuff) This is what you should be left with...... |