Step 2 - Positioning the Arms: Take the standard marine arms set and cut hands off at the wrists. Try to avoid cutting through armour plates. (first of all cutting ceramic armour is not easy at all, second- it will be hard to correct in later stages) Modeling knife on hard surface should be more than enough to accomplish this. |
SCULPTING A DARK ANGEL HERO By Marcin Radoslav Kurcewski |


CHARACTER CONVERSIONS |
Step 1 - Legs and torso: I've decided to start the conversion of a new character for my army using plastic bits. They are much easier to cut, sculpt and glue plus they are much cheaper than all the metal stuff. I wanted to base the character on one of the images I once made for Brother Master Shadow Guard. I knew I would need to reposition the hands to allow my character to use |
">

">
">
">
">
">
">
">
Step 3 - Hands: First cut off a thumb from left hand otherwise it will just look unnatural. To position hands properly I've attached a pin to right fist, the one that normally holds a bolter handle, to be able to predict direction of the blade. The entire operation is quite easy. Just heat the tip of a pin until it starts glowing red and then press it into the plastic. (If You had not done such a thing in your childhood destroying your sister's dolls |
Sculpting a Dark Angel Hero: Initial concepts and Thought Process Dark Angels in my mind always resembled mediaeval crusaders- to be exact German knights of Holy Virgin Mary- all the cowls, monkish robes... Unfortunately GW does not seem to share this thought so I've been forced to convert my figurines by myself. The one from the latest is 4th company hero with double handed sword. |


Figure 6 |
Figure 5 |
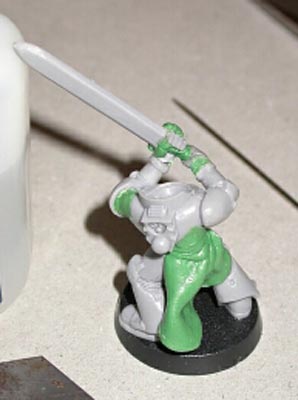
Step 5 - Sculpting the robe: Once the green stuff is dry you can start modeling a robe. In my case the technique is quite simple. I create a flat thin patches of green stuff and apply them on figure exactly like real cloth, using round end of my brush to correct folds. It requires a lot of free access to all spaces- that's why I'd suggest to not glue in shoulder pads, head or backpack before You are sure that sculpting in the surrounding area is finished. I had no other parts than the standard marine so I was forced to sculpt the hilt of the sword (winged shield with icon of 4th company), and shoulder pads. (one with the same motif as a hilt as he is a fourth company hero after all and a laurel with ribbon on the other). |
">
">
">
">
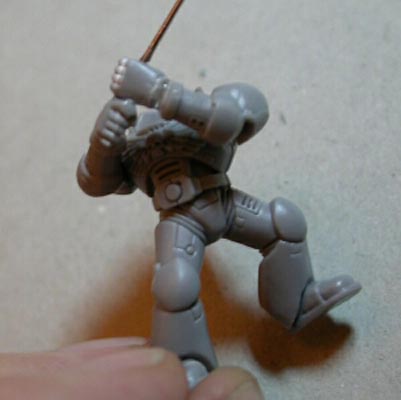
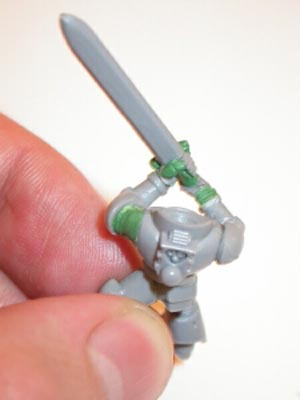
When you are done attach right arm first and make sure that it is firmly glued on before positioning left one. The trick with the other arm is that in normal situation it is too short to cover distance of breastplate. (so plastic marine cannot clap his hands) To allow your character to hold a sword You need to cheat a bit and try to glue arm slightly moved forward as on photo. The resulting space will be filled with green stuff putty later.Put entire figurine away to set. Time to work on hands. |
">
">
">
">
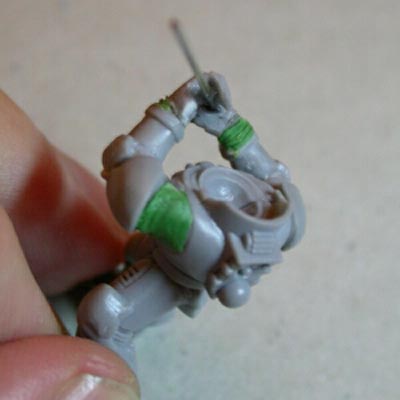
or brother's favorite plastic soldiers, first try on spare plastic to get a proper feelfor the material) As it cools up it holds firm and not a drop of glue has been required. Now- the hardest part-attaching hands to arms. In my case I've virtually melted right fist's base with modeling glue (do not exaggerate it or it will melt totally), attached it to the stump of the right arm and hold it until it stuck, but to a point where it was still soft enough to allow repositioning. Then attach the left one above it and it should look like the image above. Put it on side to dry. |
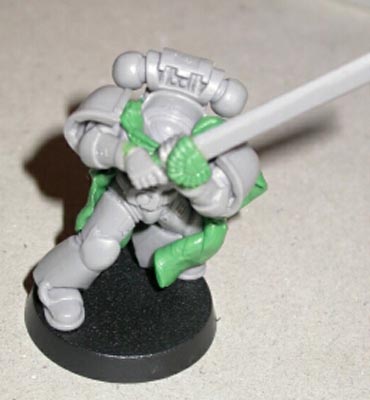
Step 4 - Sword in hand: Rest of the preparation is relatively easy. I picked a flat beam of sprue from the box and cut out the shape of a blade. Then the pin was removed and blade glued on the top of left fist. |
Small correction with green stuff, first filling up gaps between arms and torso, later joints of armour on hands (if You had been careful when cutting off hands no one will be able to see difference and sculpting on wrists is really nothing- just parallel lines). Thumb can be a problem but you can always glue in one you had cut off. If you are lucky enough to have original plastic swords (I've seen very nice ones in Mordheim mercenaries boxed set) the hilt may cover most of imperfections on hands. |
">
">
">
">
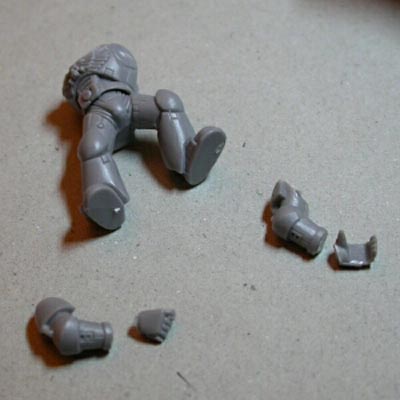
double handed sword. From the plastic sprue choose a set of legs with one that is straightened at the knee, giving the impression of having the entire mass of the body on one leg. Fortunately the legs do not require any modification so you can just remove the casting lines and put it aside. Choosing the torso is no different. Just pick up one you like as all of them are identical in terms of measure' so it should not be a big deal. After all the preparations combine legs with torso directed towards stretched out leg. Now to the arms! |