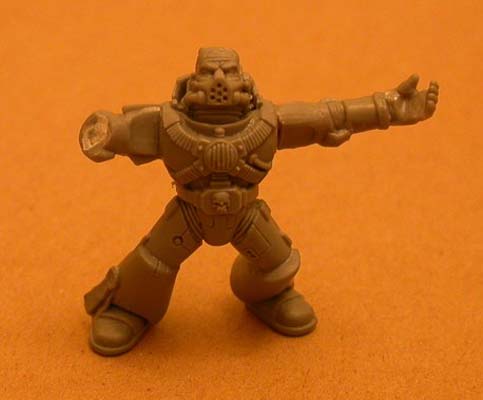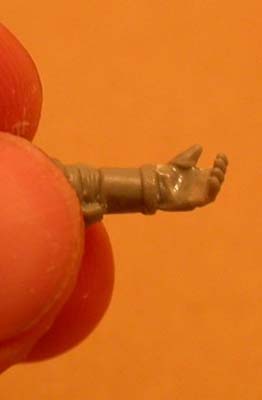
Step 2 - The left hand: Now for the hard part, which is the preparation of the hands. Let's start with left one first. Normally marine supports bolter with this hand so modification for supporting chain is not as hard as it seems initially. All you need to do is make a shallow cut on inner side of his fingers and cautious bend the weakened plastic to open his grip slightly. When it is done cut off a thumb and re-attach it as on photo. Then apply small amount of polystyrene glue to melt and re- compose weakened structure of palm. Watch out to not overload glue as it |
SCULPTING A DARK ANGELS INTERROGATOR - CHAPLAIN By Marcin Radoslav Kurcewski |


CHARACTER CONVERSIONS |
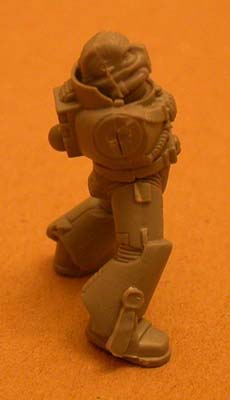
Step 1 - Legs and torso: This time I have chosen a set of legs with the center of gravity set just in the middle as I want to achieve impression of a pose directed towards front. After cleaning up elements, attachment of the legs, head and torso is quite straight forward. Just try to remember about "bending" the body of the miniature towards the back. The chaplain should look at the sky, slightly above heads of enemies, seeking divine inspiration. |
">

">
">
">
Step 3 - Right hand : Now the right hand. All you need to do here is to cut off the arm below the elbow, following lines of armour and cut off rounded part of shoulder exactly as before. If you have gotten this far the rest is a piece of cake. Attach left arm to torso with opened palm facing the sky. Now attach a right upper part of arm, pose it as on photo and wait until joints will dry. Then using polystyrene glue attach right forearm and put a small piece of polystyrene (it can be a bit cut previously from the arm or just a fragment of supporting beam) into opening on inner side of wrist to strengthen the structure. Do not bother with being to exact- gap will need filling with green stuff anyway. When the glue is dry you are finished with mainframe of your chaplain miniature. |
Sculpting a Dark Angel Interrogator Chaplain: Initial concepts and Thought Process This conversion is much easier than IV th company hero described previously. Basic philosophy remains the same- to use a cheapest possible solution and achieve effect that will stand ground against standard GW miniatures. As in previous one materials used are quite simple- one standard plastic tactical marine with bare head, some green stuff and a cheap fake jewelry chain. As always polystyrene glue and superglue, sharp modeling knife... and that's all I think. |


Figure 6 |
Figure 5 |
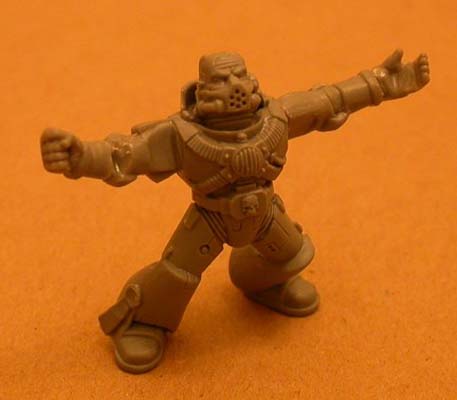
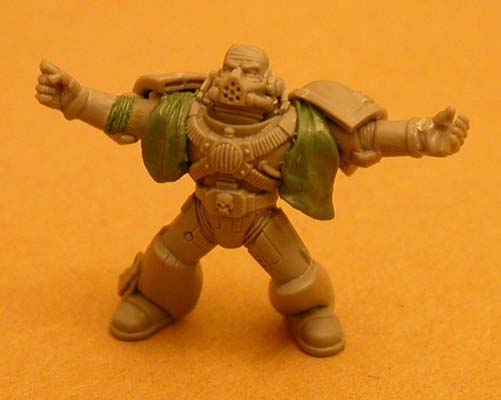
Step 4 - Filling: Now fill up gap in the right arm almost to level of armour and with an edge of the knife mark "bars" of material normally filling up the joints (something similar to rubber I presume). Gaps between arms and torso should be filled with small amounts of green stuff. When this "filler" hardens you can start to model the robe. My approach is to cut out flat strap of GS in shape of long rectangle and hang it, attaching on the shoulders. If the piece is thin enough folds will appear naturally, almost without the necessity of working on it. You can just underline them a bit using toothbrush or rounded adding of painting brush. |
">
">
">
">
will destroy the surface of armour although do not pay too much attention to detail on inner side of palm. The chain placed here will hide some of inaccuracies anyway. To allow easier attachment of the arm to the shoulder cut the shoulder end of the armin to a flat surface to match the area on the body allowing the arm to be attached extended. |
">
">
">
">
Step 4 - Sword in hand: Rest of the preparation is relatively easy. I picked a flat beam of sprue from the box and cut out the shape of a blade. Then the pin was removed and blade glued on the top of left fist. |
">
">
">
">