
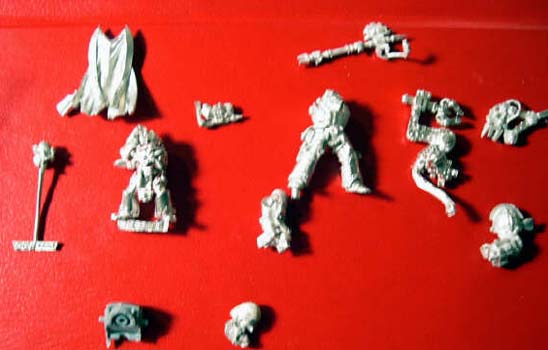
Preparation - Ideas & Bitz for the conversion:: Before I start any conversion I sit down and come up with how I want the end product to look. Thank god for the new catalogue, as it really is a great place to find poses and conversion ideas. I really like how the new tech adepts look for the imperial guard. The cowled look fits in with the rest of the command squad. I also wanted to make the techmarine look like he had been around for awhile, so that meant purity seals and lots of gadgets. This is everything I used for the conversion. As you can see the terminator consists of a greyknight terminator body with the greyknight |
CONERTING A DEATHWING TECHMARINE By Fabio van der Merve |


CHARACTER CONVERSIONS |
Preparation - The tools of the trade:: Here is a list of all the tools I use, some a pretty standard, others are not: Jewelers saw - with fine or extra fine blades Extra fine sandpaper Pin vice Pliers Sculpting tools Green stuff Milliput superfine: Milliput is a great putty. Unlike greenstuff, it is water soluble before it dries so you can work with it much the same way as |
">

">
">
">
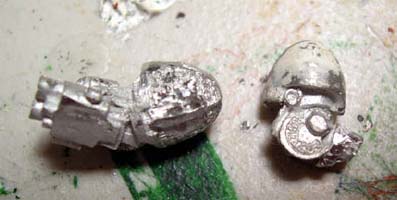
GETTING THE TORSO READY Step 1 - Preparing the model: |
Converting a Deathwing Techmarine: Initial concepts and Thought Process After the 2004 Boston GT, I decided that I was going to enter my Deathwing command squad in this year's Golden daemon competition. Looking at the command squad, I realized I could not call it a true command squad unless I had a techmarine to go along with my apothecary. Since I have gotten a lot of emails about how I converted my terminators, I decided to document the process, in the hope that some questions were answered. I am going to do this in parts as I have a lot of pictures, and putting it all in one thread would cause it to take for ever to load. I must warn you that this conversion is not an easy one to do. It took me three initial test models and 17 terminator conversion to get good at it. Hopefully, people can take away something in order to make their terminators look better, until the new terminators are released. Questions and comments are always welcomed. |


Figure 6 |
Figure 5 |
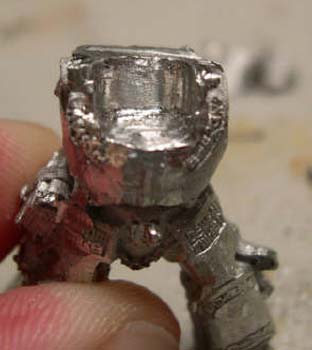
Step 2: The Torso: After the milliput has dried and everything has been sanded, the next step is to get the greyknight torso ready to be converted to look more in line with the regular terminators. The very top half of the greyknight needs to be cut off to make room for the plastic hump. My initial cut is right above where the arm is placed. This is a thin cut, that is why I suggest very fine or fine saw blades. |
">
">
">
">
arms and the plastic terminator hump. To make it look like a techmarine I am used the space marine servo arm, the tech adept servo arm and axe, and an auspex |
">
">
">
">
Step 2: The Torso (cont): To keep the cut straight I suggest cutting around the model to make a guide groove, and then use the guide grooves to cut all the way through. |
">
">
">
">
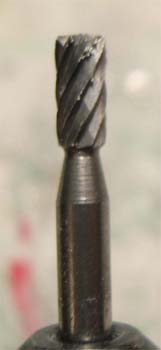
clay. It also becomes very hard and rigid once it dries. This is great because you can actually sand it. These properties make it great for filling in holes and making cloaks. I get the superfine kind just because it has a much smother surface once sanded than the regular milliput. Milliput is not good for any details as it is a little harder to control than greenstuff. Dremel: The most important bit to get for you dremel when working with metal is the high speed cutting bit. It comes in different shapes, but this is the type I use. This is a must as it makes cutting metal so easy. With out this bit, I would not be able to do this conversion. You can get most of things from micromark on the web. |
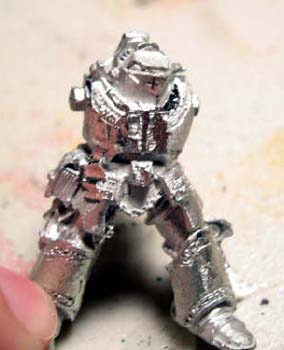
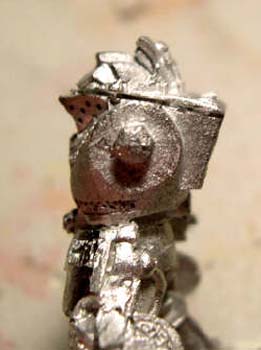
The first thing is to get the greyknight not to look like a greyknight. I filled in all the symbols with milliput and sanded them, as well as cut off the book on the front plate. On the left arm (has the greyknight symbol) I used my high speed cutting bit and carefully ground down the book only to leave the sword. This will become the basis for the DA symbol. |
">
">
">
">
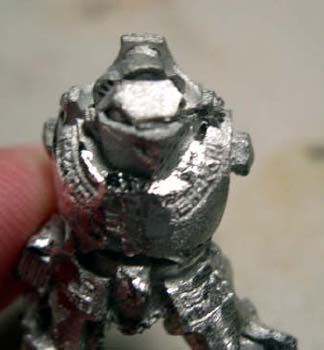

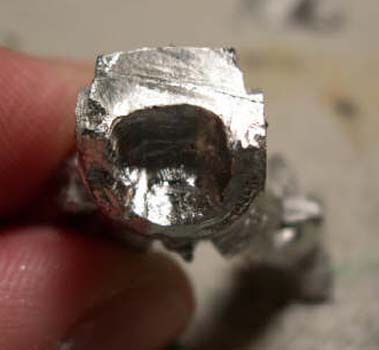
This is what it should look like after I filed down the top to make it somewhat smooth. |
">
">
">
">
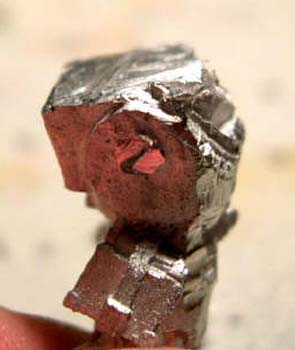
Step 3: I need some head space!! Using the high speed bit again, I dremeled out what is left of the greyknight's head. |
You need to make this space wide and deep enough to fit a space marine head. It is a good thing to have one handy to test out the fit. |