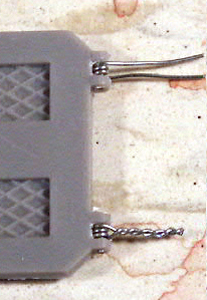
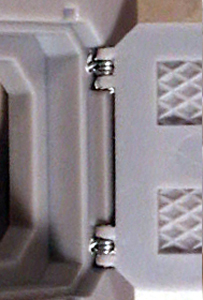
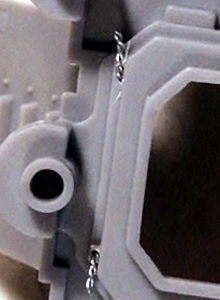
Step 5: Door Installation Drill holes in the corresponding area under the where the hinges rest on the rhino and slide the twisted wire into place then it's just a matter of flipping the rhino section over and bending the wire to keep the door tightly in place. Because there is no glue involved and there is flexibility in the wire adjusting the doors motion to perfection isn't terribly hard. You'll probably need to remove a little material from here the bottom of the door and the frame meet to allow for the door to move all the way down to touch the ground. This is where the glue comes in, if you feel the hinges need a little more stability just add a drop of glue between the plastic and the bent wire on the interior of the rhino wall. |

WORKING RHINO DOORS By Guy Gregory ( Brother Exodus ) |


VEHICLES & WARMACHINES |
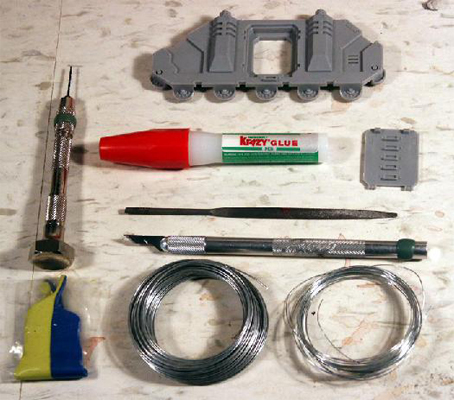
Step 1: Required Tools: Pin vice (this will get A LOT of use) Wire (two gages and matching drill bits) Knife File 1 Rhino (obviously) Pliers (not shown) Not So Required Tools: Green Stuff (for correct ?accidents?) Glue (that?s right, you don?t actually NEED glue for this |
">

">
">
">
">
">
">
">
">
">
">
">
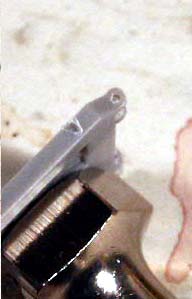
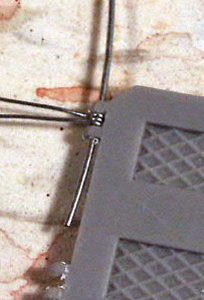
Step 4: Hinge Preparation This is where all the fun with wire comes in, begin by wrapping the smaller gage of wire around the larger about 3 times into somewhat of a spring apparatus leaving the two long ends to one side. After you have done that for both hinges simply thread the wire through the door hinges and coiled wire. It's extremely unlikely that the area you removed from the door hinge above is large enough to thread everything together on the first try, if you're having a hard time threading it all together just file away until it all fits. Once it's all together use the pliers to twist the loose ends together. |


">
">
">
">
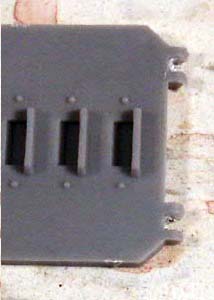
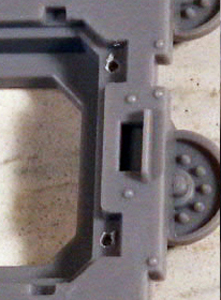
Step 2: Door Preparation There are very delicate pieces of plastic in the hinge area. One can't just go hacking away at the middle section of the hinge, when you use a knife you're simply driving more material into the area to split it apart, do this and you could weaken the plastic around the area to be removed. So drill a hole through the middle of the hinge so the plastic has a place to go when you cut it out with your knife. Once all material is removed drill through the hinge, and be careful when lining up your pin vice, the hinge doesn't have to be perfectly aligned, but it helps. |
Figure 6 |
Figure 7 |


Working Rhino doors: Initial concepts and Thought Process If there's one thing that always bugged me about the rhino it's the fact that they went ahead and built in the ability for the rear ramp to open, but just left the other 3 to sit there in all their glued in place glory. I've seen several attempts at the conversion, but none that have seemed practical, I'm not a fan of using green stuff, nor am I a plasticard person. The most appealing aspect of this method is that you will most likely have to tools required already, if you have pinned you can create a working rhino. |
">
">
">
">