
How to provide interior lighting for a Rhino MkII: Initial concepts and Thought Process Why add lights in the first place? The answer should be obvious! Because you can! Nah, seriously, Games Workshop has made some brilliant kits lately, which feature quite good interior detailing, working doors and nifty stuff like that why not show off what you did to the interior of your cool models? If you're the type that simply glue the rear hatch shut, then you probably wouldn't even consider doing this guide. What got me started on adding lights? It started out as a joke really. When I got my hands on the new Land Raider kit (Mk. V), even though I was very excited with it, I took my sweet time doing all the interior details, even adding extra stuff as I went along. When my brother saw this, he immediately started mocking me, saying stuff like "Why do you bother, nobody will see it anyway!" and finally: "Why don't you put some LED's in there while you're at it!" In the end, he ended up proving a most valuable help when doing the first mod. On the Land Raider, we could simply just have fitted a simple on/off switch to the bottom, like with this Rhino later on, but no We managed to install an automatic switch in the left-hand side track, so when you open the door, it goes *click* and the lights turn on. You could even swap the batteries with relative ease. Adding working lights to your Space Marine Rhino kit: Having been asked the same question time and time again; "How do you add lights to your Rhinos?" I decided to do this guide. I've put A LOT of time into this, about two hours worth of writing / editing pictures, so keep the criticism constructive! |
RHINO MkII INTERIOR LIGHTING By Simon Larsen |


VEHICLES & WARMACHINES |
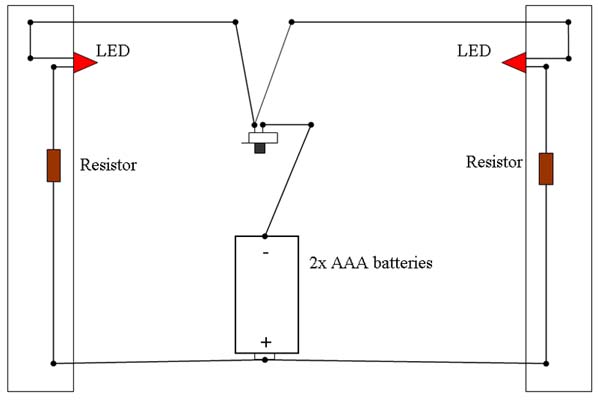
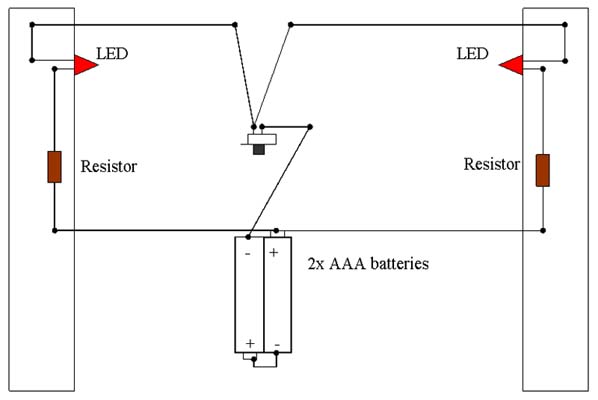
Step 1: Materials: 2 x LED (Light-Emitting Diode), colour of your choice. 2 x ~200 resistors. (If you haven't got one of the right value, and must have a replacement, use a lower value, such as ~180 ) 2 x AAA 1.5 volt alkaline batteries. 1 x On/Off mechanical switch. Insulating tape. 2 different colours of wire. Shrinkage-tubing for insulating wires. |
">

">
">
">
">
">
">
">


">
">
">
">
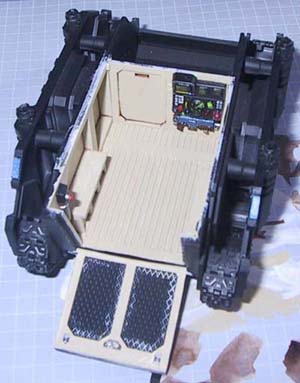
Step 1.1: Paint the insides! Obviously, you need to paint everything inside beforehand. Painting it after the lights are fixed will be quite a challenge. |
Figure 6 |
Figure 7 |


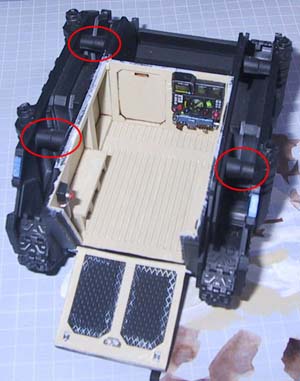
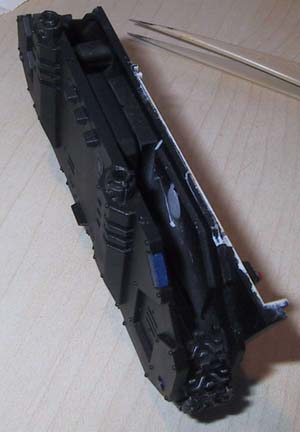
Step 1.2: Cut away supporting plastic joints: Cut away 3 of the 4 supporting plastic-joints between the outer and inner half of each track. On the left-hand side, you will need to remove 2. If you're a bit short on working space later on, you can also remove the second one on the right-hand side, but it shouldn't be necessary. Here's how the back-side should look after removal: |
Tools: Soldering iron. The usual assortment of pliers, crafting knife etc. Assorted drills, up to 3mm in diameter. (Pin vice is good.) Superglue. Hot glue gun. Before we skip onto the soldering, you need to prepare your Rhino. |
">
">
">
">
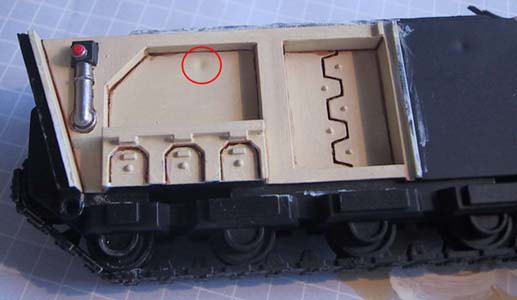
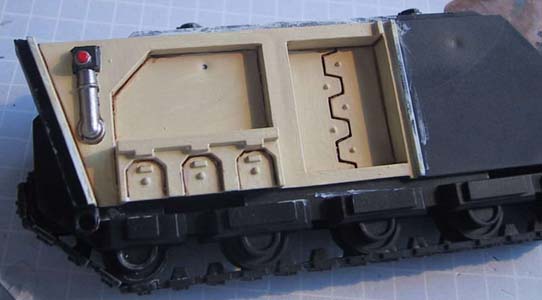
Step 1.3: Drill them holes! This is where we will be doing the drilling. Obviously it's a moulding-error, but it seems to be consistent, I've seen it on all my Rhino kits which makes it a perfect spot! So drill away, start by using a very small drill, and then slowly increase the diameter until you reach the 3mm of the LED. |